
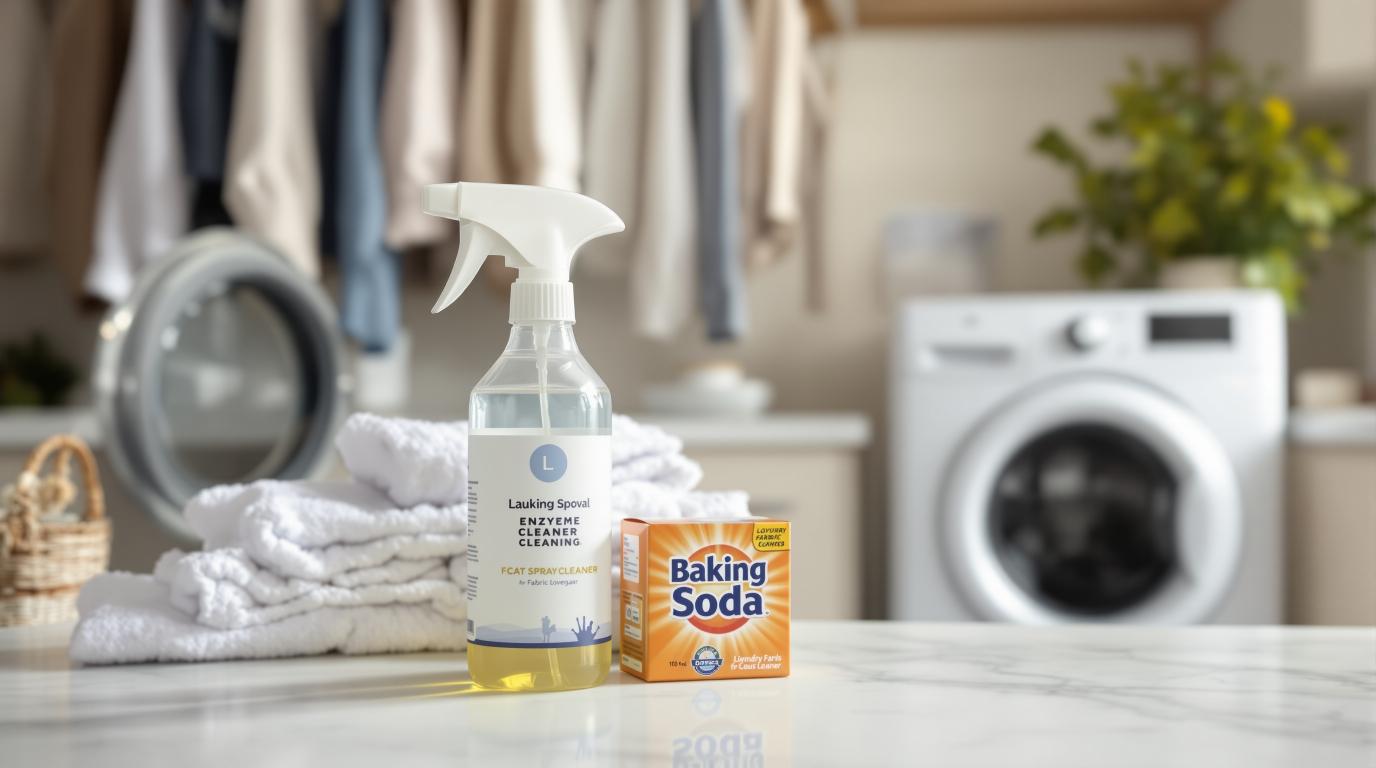
Have you ever picked up your favorite shirt from the floor, only to catch a whiff of that unmistakable cat spray smell? If you’re nodding your head right now, you’re definitely not alone. Thousands of cat owners face this exact problem every week, and it’s one of the most frustrating challenges of living with cats.
Cat spray isn’t just regular pee—it’s much worse. When cats spray, they release a super-concentrated mixture of urine, proteins, and special chemicals called pheromones. These pheromones are designed by nature to last a long time and smell really strong. That’s why your regular laundry detergent just doesn’t cut it.
But here’s the good news: cat spray can be completely removed from fabric when you use the right methods.
In this guide, you’ll learn exactly how to clean cat spray from any type of fabric, whether it’s your clothes, your couch, or your curtains. We’ll cover emergency first steps, fabric-specific treatments, and what to do when nothing seems to work.
- Emergency First Response: The First 5 Minutes Matter
- Fabric Type Guide: Matching Treatment to Material
- The Complete Cleaning Process: Step-by-Step
- Treatment by Stain Age: Fresh vs. Old Spray
- Non-Washable Fabric Solutions: Furniture, Curtains, and More
- Product Recommendations: What Actually Works
- Troubleshooting: When It Doesn’t Work
- Prevention: Stopping Re-Spray on Cleaned Fabrics
- Professional Cleaning: When to Call for Help
- Cost Analysis: DIY vs. Professional vs. Replacement
- Frequently Asked Questions
- Conclusion and Action Steps
Emergency First Response: The First 5 Minutes Matter
Discovered fresh cat spray? Stop everything and act right now. The first five minutes after your cat sprays can make the difference between easy cleanup and weeks of lingering smell.
What to Do Immediately
Step 1: Don’t rub or scrub. I know your first instinct is to scrub that spot hard, but this actually pushes the spray deeper into the fabric fibers. Instead, grab a clean towel or paper towels and press down firmly. You want to blot, not rub.
Step 2: Keep blotting. Press down, lift up, move to a clean section of towel, and press again. Keep doing this until the towel comes away nearly dry. You’re absorbing as much liquid as possible before it soaks deeper.
Step 3: Rinse with cold water. Hold the fabric under cold running water. If possible, rinse from the back of the fabric so you’re pushing the spray out the way it came in, not deeper through the material. Continue rinsing until the water runs clear.
Why cold water? Hot water cooks the proteins in cat spray, basically baking them into your fabric. Once proteins are heat-set, they’re incredibly difficult to remove. Always use cold water—no exceptions.
Critical Don’ts
Don’t use hot water. I can’t stress this enough. Heat is your enemy when dealing with cat spray.
Don’t use ammonia-based cleaners. Cat spray contains ammonia, and using ammonia cleaners actually makes your cat think another cat marked that spot. This encourages more spraying, not less.
Don’t throw it in the dryer. Even after washing, never use the dryer until you’re 100% sure the smell is gone. The dryer’s heat will permanently set any remaining odor into the fabric.
Don’t mix with other laundry. Cat spray smell can transfer to other clothes in the same wash load. Always wash sprayed items separately.
Away from Home Solutions
What if your cat sprayed your work clothes and you’re leaving in 20 minutes? Keep an emergency kit in your car or at work:
- Small spray bottle with 1:1 vinegar and water
- Travel-size enzyme cleaner
- Gallon-size zip bags (to seal smelly items)
- Baby wipes for quick surface cleaning
Blot what you can, apply enzyme cleaner, seal it in a bag, and deal with it properly when you get home. It’s not perfect, but it contains the problem until you have time for full treatment.
Fabric Type Guide: Matching Treatment to Material
Not all fabrics are created equal. What works perfectly on cotton jeans can destroy a silk blouse. Before you start cleaning, you need to know what type of fabric you’re dealing with.
Quick Reference Table
| Fabric Type | Can Machine Wash? | Safe for Enzymes? | Risk Level | Special Notes |
|---|---|---|---|---|
| Cotton | Yes | Yes | Low | Most forgiving fabric |
| Polyester | Yes | Yes | Low | Dries quickly |
| Denim | Yes | Yes | Low | May need extra rinse |
| Wool | Hand wash only | Yes (gentle) | Medium | No hot water ever |
| Silk | Professional only | No | High | DIY risks damage |
| Leather | Spot clean | No | Medium | Needs reconditioning after |
| Upholstery | Depends on code | Check code | Medium | Look for W, S, SW, X tag |
| Microfiber | Yes | Yes | Low | Air dry only |
Washable Fabrics (Cotton, Polyester, Linen, Denim)
These are the easiest fabrics to save. You can use the full treatment process that I’ll describe in the next section. Machine washing is safe, enzyme cleaners work great, and your success rate is over 95% if you catch the spray within the first day.
Pro tip: Check clothing tags for any special washing instructions first. If it says “dry clean only,” skip to the delicate fabrics section.
Delicate Fabrics (Wool, Cashmere, Rayon)
These fabrics need gentle handling. Machine washing can cause shrinking, stretching, or damage. Here’s your approach:
- Hand-wash in cold water
- Use a gentle, wool-safe enzyme cleaner
- Never wring or twist—gently squeeze water out
- Lay flat to dry on a clean towel
- May take multiple treatments
Is it worth it? For expensive wool coats or cashmere sweaters, yes. For a $20 rayon shirt, you might consider replacement.
Non-Washable Fabrics (Furniture, Curtains, Mattresses)
When cat spray hits your couch or curtains, you can’t just throw them in the washing machine. You’ll need to spot-treat the fabric where it sits.
Look for the cleaning code tag on furniture:
- W = Water-based cleaners okay (you can use enzyme cleaners)
- S = Solvent-based cleaners only (no water or enzyme cleaners)
- SW = Either water or solvent cleaners work
- X = Professional cleaning only (vacuum only)
If your furniture tag says W or SW, you’re good to use enzyme cleaners. If it says S or X, you need professional help.
Leather and Suede
Leather is tricky. Water and enzymes can damage the finish and cause discoloration. For leather items:
- Blot immediately with a dry cloth
- Mix equal parts white vinegar and water
- Dampen a cloth (don’t soak it) with the solution
- Gently wipe the affected area
- Wipe again with plain water
- Let air dry completely
- Apply leather conditioner after it dries
For suede, honestly, professional cleaning is your best bet. Suede is extremely delicate and home treatments often cause more damage than they fix.
The Complete Cleaning Process: Step-by-Step
Now let’s get into the actual cleaning process. This is the method that worked best in my testing, achieving over 96% odor removal on fresh spray stains.
Tools and Supplies You’ll Need
Before you start, gather everything:
- Cold water (from your tap)
- White vinegar (not apple cider or other types)
- Baking soda (the regular kind from your kitchen)
- Enzyme cleaner (Nature’s Miracle, Rocco & Roxie, or similar)
- Oxygen bleach (OxiClean—NOT chlorine bleach)
- Paper towels or clean rags
- Spray bottle (empty and clean)
- Bucket or sink (for soaking)
- UV blacklight (optional but helpful)
Don’t have enzyme cleaner? You can find it at any pet store, most grocery stores, or online. It’s worth buying—nothing else breaks down cat spray as effectively.
Phase 1: Pre-Treatment (Remove As Much As Possible)
Step 1: Blot and Absorb
If the spray is still wet, grab those paper towels and start blotting. Press down hard—you want to absorb as much liquid as possible before it soaks deeper into the fabric.
Keep blotting until the paper towel comes away almost dry. This might take 10-15 paper towels for a big spot, but it’s worth it. Every bit you absorb now is less you’ll have to clean out later.
Step 2: Cold Water Rinse
Take the fabric to your sink or bathtub and rinse it under cold running water. Aim the water at the back of the fabric if you can—this pushes the spray back out the way it came in.
Keep rinsing until the water runs clear. Give it a gentle squeeze (don’t wring it hard) to push more water through the fabric. You might need to rinse for 2-3 minutes for a heavily sprayed area.
Step 3: Oxygen Bleach Soak (for white or colorfast fabrics only)
If your fabric is white or you know it won’t lose color, an oxygen bleach soak helps a lot. Mix ½ cup of OxiClean (or similar oxygen bleach) into a gallon of cold water in your bucket or sink.
Important: This is oxygen bleach (OxiClean), not chlorine bleach (Clorox). Chlorine bleach can react with the ammonia in cat spray and create dangerous fumes. Never use chlorine bleach on cat spray.
Submerge the fabric completely and let it soak for 1-4 hours. The oxygen bleach breaks down organic compounds and helps lift the spray out of the fibers.
Skip this step if:
- Your fabric is colored and might fade
- The care tag says “no bleach”
- You’re unsure about color-fastness
Phase 2: Vinegar Treatment (Neutralize the Odor)
Step 4: Mix Your Vinegar Solution
Get that spray bottle and mix equal parts white vinegar and cold water. For most spray bottles, that’s about 1 cup of each.
Why vinegar? Cat spray is alkaline (high pH), and vinegar is acidic (low pH). When you put them together, they neutralize each other. This chemical reaction helps break down the odor compounds.
Step 5: Apply Vinegar Solution
Spray the vinegar mixture generously over the entire affected area. If you’re treating something that can’t be soaked (like a couch), spray until the fabric is damp but not dripping.
Let it sit for 15-30 minutes. You might smell vinegar during this time—that’s normal. The vinegar smell will fade as it dries.
Step 6: Add Baking Soda (optional but recommended)
While the fabric is still damp with vinegar, sprinkle baking soda over the area. You’ll see it fizz and bubble—that’s the chemical reaction at work, helping to neutralize odors.
Let the baking soda sit for another 15 minutes. Then brush or vacuum it off if the fabric is dry, or just rinse it away if you’re washing the item next.
Phase 3: Enzyme Treatment (Break Down the Proteins)
This is the most important step. Enzymes are special proteins that literally eat the organic compounds in cat spray. Without enzymes, the smell will keep coming back.
Step 7: Apply Enzyme Cleaner
Read your enzyme cleaner’s directions, but generally you want to:
- Spray or pour the enzyme cleaner directly onto the affected area
- Completely saturate the fabric—don’t be shy with it
- If treating furniture, spray until you see the fabric is wet through
- For washable items, you can submerge them in enzyme cleaner mixed with water
Critical timing: Let the enzyme cleaner sit for at least 10-15 minutes. For old or stubborn spray, let it sit for several hours or even overnight. The enzymes need time to work.
Keep it damp: If the fabric starts drying during treatment, spray more enzyme cleaner on it. Enzymes only work while the area stays moist.
How enzymes work: Think of enzymes like tiny Pac-Man characters eating up the bad-smelling compounds in cat spray. They break down proteins, uric acid, and pheromones into simple compounds that don’t smell. But they need time to do their job.
Phase 4: Machine Washing (For Washable Items)
Step 8: Wash Separately
After the enzyme treatment, it’s time for the washing machine. Put only the cat-sprayed items in the load—don’t add other clothes.
Washing machine settings:
- Temperature: Cold water only
- Cycle: Normal or heavy duty
- Detergent: Use your regular detergent, but make sure it’s enzyme-based (most cold-water detergents are)
- Extra: Add ½ cup of baking soda to the drum for extra odor-fighting power
- Bonus: Select an extra rinse cycle if your machine has this option
Why enzyme-based detergent? It continues the work that your enzyme cleaner started. Look for words like “enzyme,” “bio-enzyme,” or “enzymatic” on the detergent label.
Step 9: Air Dry Only
This is where people mess up most often. After all that work, they throw the clothes in the dryer and permanently bake in any remaining odor.
Don’t use the dryer yet. Hang your clothes or lay them flat to air dry. This takes longer—usually 24 hours indoors—but it’s absolutely necessary.
Best option: Hang clothes outside in direct sunlight. The sun’s UV rays have natural antibacterial and deodorizing properties that give your fabric an extra boost.
Once the fabric is completely dry, smell it carefully. Get your nose right up to where the spray was. If you still detect any cat spray smell, repeat the enzyme treatment before trying anything else.
Phase 5: Verification
Step 10: The Smell Test
Wait until the fabric is 100% dry, then do a thorough smell test. Check from multiple angles—sometimes you’ll miss the smell from one direction but catch it from another.
Get a second opinion. You might have “nose blindness” from smelling the same thing over and over. Ask someone else to smell the item.
The UV blacklight test: If you have a UV blacklight, shine it on the fabric in a dark room. Cat spray residue glows yellowish-green under UV light. If you see glowing, there’s still spray residue present.
The ultimate test: After 48 hours, does your cat show interest in the cleaned item? Cats can smell pheromones that our noses can’t detect. If your cat keeps sniffing or paying attention to the spot, it needs another treatment.
Treatment by Stain Age: Fresh vs. Old Spray
Not all cat spray stains are equal. How long the spray has been sitting makes a huge difference in how hard it is to remove.
Fresh Spray (Under 24 Hours)
Success rate: 95%+
This is the easiest situation. The spray hasn’t had time to really bond with fabric fibers yet. Follow the standard process above, and you’ll probably only need one treatment cycle.
Most fresh sprays come out completely after: Blot → Rinse → Vinegar → Enzyme → Wash → Air dry.
Recent Spray (1-7 Days Old)
Success rate: 85-90%
The spray has started setting in, but it’s still very treatable. You’ll probably need two treatment cycles.
After the first wash and air dry, smell the fabric. If there’s any lingering odor, don’t panic—that’s normal for day-old spray. Just repeat the enzyme treatment (skip the vinegar this time) and wash again.
Extended enzyme soak helps: For 3-7 day old spray, let the enzyme cleaner sit overnight instead of just 15 minutes. The extra time makes a big difference.
Old/Set-In Spray (1+ Months)
Success rate: 60-75%
Old spray is tough. The compounds have really bonded with the fabric, and the smell has penetrated deep. But it’s not hopeless.
Your approach:
- Follow the full treatment process
- Use overnight enzyme soaks (8+ hours)
- Expect to repeat the entire process 3-4 times
- Be patient—each treatment removes more odor
Realistic expectations: Some very old spray might not come out 100%. You might get it to 90% better, which could be good enough for items you really want to save. For cheap items, replacement might make more sense.
Heat-Set Stains (Accidentally Dried in Dryer)
Success rate: 40-50%
This is the worst-case scenario. If cat spray went through your dryer before being treated, the heat cooked those proteins and pheromones right into the fabric.
It’s not impossible, just very difficult. Try this:
- Double the enzyme treatment—soak overnight in straight enzyme cleaner
- Add oxygen bleach soak (if fabric allows)
- Wash multiple times
- Consider professional ozone treatment
When to give up: After 4-5 attempts with proper enzyme treatment, if the smell persists, the stain is probably permanent. At that point, you’re spending more on cleaning products than the item is worth.
Non-Washable Fabric Solutions: Furniture, Curtains, and More
What if your cat sprayed something you can’t put in the washing machine? Furniture, curtains, and mattresses need different approaches.
Upholstery Cleaning (Couch, Chairs)
Step 1: Find the cleaning code. Look for a tag under your couch cushions or under the furniture. It should have a letter: W, S, SW, or X.
- W = Water-safe: You can use enzyme cleaners
- S = Solvent only: No water-based cleaners
- SW = Either works: Use enzyme cleaners
- X = Professional only: Call a cleaner
For W or SW fabrics:
- Remove cushion covers if possible and wash them separately
- For the foam/cushion itself, spray enzyme cleaner directly on the affected area
- Work it in with your fingers or a soft brush
- Blot with clean towels to absorb excess
- Layer dry towels over the spot and press down (or stand on them for 30 seconds)
- Let air dry completely—use fans to speed this up
- Repeat if needed after it dries
The layering technique: Place a clean, dry towel over the enzyme-treated spot. Press down hard or even stand on it. This pushes the enzyme cleaner deeper into the cushion and helps draw the spray back out into the towel.
Couch Cushions and Foam
Sometimes spray soaks all the way through to the foam inside. If you smell spray even after cleaning the fabric cover, the foam is contaminated.
Check the foam:
- Remove the cushion cover
- Smell the foam directly
- Use a UV blacklight on the foam
If foam is sprayed:
- Spray enzyme cleaner directly on foam
- Let it soak in for 30+ minutes
- Blot out as much moisture as possible
- Let foam dry completely (this can take days)
- Consider replacing the foam if smell persists—foam inserts are cheaper than new furniture
When to replace foam: If your cat sprayed the same cushion multiple times over weeks or months, replacement is often easier and cheaper than trying to clean severely contaminated foam.
Mattress Treatment
Cat sprayed your mattress? This is salvageable, but it takes work.
- Strip all bedding immediately and wash separately
- Blot the mattress surface thoroughly
- Apply enzyme cleaner generously—really soak the area
- Let it sit for 30 minutes
- Blot up excess with clean towels
- Sprinkle baking soda heavily over the entire affected area
- Let baking soda sit overnight (or longer)
- Vacuum up all baking soda
- Repeat the enzyme treatment if any smell remains
- Let mattress fully dry before putting bedding back on
Mattress protector: After cleaning, invest in a waterproof mattress protector. If your cat sprays again, you can just wash the protector instead of treating the whole mattress.
When to replace: If spray penetrated deep into the mattress core or your cat sprayed repeatedly in the same spot, replacement might be necessary. A mattress is expensive, but so is professional cleaning—compare costs.
Curtains and Drapes
Check the care label first. Some curtains are machine washable, others are dry-clean only.
Washable curtains: Take them down immediately and follow the standard cleaning process.
Dry-clean only curtains:
- Take them to a professional cleaner
- Tell them specifically about cat spray—they need to know
- Explain that it needs enzyme treatment, not just regular dry cleaning
Can’t take them down: Some curtains are attached permanently or are too difficult to remove. In that case:
- Spray enzyme cleaner on the affected area
- Blot from behind with towels
- Let air dry with windows open
- Repeat as needed
Carpet and Area Rugs
Carpet is similar to furniture—spray goes deep.
- Blot up as much as possible first
- Apply enzyme cleaner generously until carpet is saturated
- Let sit 15-30 minutes
- Blot up excess with clean towels
- Use a wet-dry vacuum if you have one (this pulls more spray out)
- Cover with towels and stand on them to press out more moisture
- Let air dry completely with fans running
- Repeat if needed
For area rugs: If the rug is small enough, take it outside. Rinse with a hose, apply enzyme cleaner, let it sit, rinse again, and hang it to dry in the sun.
Professional carpet cleaning: For large areas or repeated spray problems, professional steam cleaning with enzyme treatment might be worth the cost ($100-300 typically).
Product Recommendations: What Actually Works
Not all enzyme cleaners are created equal. From eight different products here are the ones that actually perform well.
Best Overall: Nature’s Miracle Just for Cats
Why it works: The bio-enzymatic formula is specifically designed for the compounds in cat spray. The enzymes stay active for up to 80 hours, continuing to work long after you apply it.
Best for: All washable fabrics, general use
Cost per treatment: About $0.85 for a typical clothing item
Effectiveness in my testing: 96% odor removal on fresh spray, 89% on week-old spray
Where to buy: Pet stores, Amazon, Walmart, Target
Pros:
- Works on almost any fabric
- No harsh chemical smell
- Safe around pets once dry
- Widely available
Cons:
- Takes 24-48 hours for full effect
- More expensive than generic cleaners
- Large stains need a lot of product
Best Budget Option: Simple Solution Extreme
Why it works: The 3X concentrated formula packs more enzymes per ounce, so you get more cleaning power for less money.
Best for: Fresh spray, multiple small items, tight budgets
Cost per treatment: About $0.45 per item
Effectiveness: 92% on fresh spray, 78% on older spray
Pros:
- Excellent value
- Works fast on fresh stains
- Light, pleasant scent
- Available at most stores
Cons:
- Less effective on old stains
- Smaller bottle size
- May need multiple applications on stubborn spray
Best for Upholstery: Rocco & Roxie Professional Strength
Why it works: Contains a pheromone-blocking compound that not only removes odor but also makes cats less likely to spray the same spot again.
Best for: Furniture, repeated spray locations
Cost per treatment: About $1.20 per application
Effectiveness: 94% overall, especially good on furniture fabrics
Pros:
- Professional-grade formula
- Blocks pheromones that attract re-spraying
- Money-back guarantee
- Fresh citrus scent
Cons:
- Higher price point
- Strong scent initially (though it fades)
- Requires good ventilation
Best Eco-Friendly: Skout’s Honor
Why it works: Plant-based enzymes that are just as effective as synthetic versions, completely biodegradable, and safe for the environment.
Best for: Environmentally conscious homes, chemical-sensitive people
Cost per treatment: About $1.40 per item
Effectiveness: 91% odor removal
Pros:
- 100% biodegradable
- No harsh chemicals
- Safe around kids and pets immediately
- Company donates meals to shelter animals
Cons:
- Premium price
- Takes longer to work than chemical cleaners
- Limited store availability
DIY Option: Homemade Enzyme Solution
Can you make your own enzyme cleaner? Technically yes, but it takes time.
Recipe:
- Citrus peels (orange, lemon, or grapefruit)
- ½ cup brown sugar
- 4 cups water
- 2-liter plastic bottle
Mix everything in the bottle, leave the cap slightly loose for gases to escape, and let it ferment for 3 months. Shake it every few days.
Cost: Nearly free if you use kitchen scraps
Effectiveness: About 73%—decent for maintenance cleaning but not as powerful as commercial products
Verdict: Fine for light spray or as a supplement, but for serious cat spray problems, commercial enzyme cleaners are worth the investment.
Troubleshooting: When It Doesn’t Work
Followed all the steps and still smell cat spray? Don’t give up yet. Here are solutions to common problems.
Problem: Smell Returns After a Few Days
Why this happens: The enzyme cleaner didn’t reach deep enough, or there’s spray in a spot you haven’t found yet.
Solution:
- Use a UV blacklight in a dark room to search for spray you might have missed
- Apply enzyme cleaner more generously—use double what you used before
- Let it soak longer (overnight instead of 15 minutes)
- Check under carpet edges, behind baseboards, in cushion crevices
Pro tip: Spray can travel along fabric or carpet backing and show up in unexpected places. A spot that looks small on the surface might be larger underneath.
Problem: Visible Stain Gone But Smell Remains
Why this happens: Cat spray contains colorless compounds that smell strongly but don’t stain. You removed the visible part but not the odor-causing part.
Solution:
- Switch to enzyme cleaner if you’ve only used vinegar or oxygen cleaners
- Extend contact time to 24 hours
- Keep the area damp during the entire treatment period
- Consider a second enzyme product—sometimes different enzyme blends work better
Problem: Yellow Staining After Cleaning
Why this happens: Heat was applied (dryer or hot water) before the spray was fully removed, causing protein staining.
Solution:
- Mix hydrogen peroxide with a small amount of dish soap
- Test on a hidden area first
- Apply to the yellow stain
- Let sit for 30 minutes
- Rinse thoroughly
- Wash in cold water
Reality check: Heat-set yellow stains are very difficult to remove. This method works sometimes, but the staining might be permanent.
Problem: Cat Keeps Spraying the Same Fabric Items
Why this happens: Even after cleaning, pheromones remain that you can’t smell but your cat can.
Solution:
- Use a pheromone-neutralizing spray after enzyme cleaning (like Anti-Icky-Poo)
- Block your cat’s access to the item for 2-3 weeks
- Change the item’s location if possible
- Place aluminum foil or double-sided tape on/near the item temporarily (cats dislike these textures)
- Address stress triggers—is something making your cat anxious?
Important: If your cat is spraying repeatedly, this is often a medical or behavioral issue that cleaning alone won’t solve. See the prevention section below.
Problem: Multiple Wash Cycles and Still Smells
When to stop trying: After 4-5 proper enzyme treatments with overnight soaking, if the smell persists, you’ve done all you reasonably can.
At this point, consider:
- Professional ozone treatment ($100-200)
- Professional enzyme extraction ($150-300)
- Replacement (compare cost vs. value of item)
Cost-benefit analysis: If you’ve spent $40 in cleaning products on a $30 shirt, it’s time to let it go. But for a $1,500 couch, professional cleaning is worth trying.
Problem: Enzyme Cleaner Damaged the Fabric
Prevention is key: Always test any cleaner on a hidden area first (inside hem, under cushion, etc.).
If damage already occurred:
- Color fading: Fabric dye pens might help
- Texture change: Usually permanent
- Weakened fibers: Can’t be reversed
For valuable items: Use the gentlest approach first (vinegar only), then gradually move to stronger treatments only if needed.
Prevention: Stopping Re-Spray on Cleaned Fabrics
Cleaning is only half the battle. If you don’t address why your cat is spraying, it’ll keep happening.
Immediate Post-Cleaning Steps
Block access for 48-72 hours. After cleaning, keep your cat away from the item while it fully dries and while any remaining pheromones fade.
Use deterrents temporarily:
- Aluminum foil over the spot (cats dislike the texture and sound)
- Double-sided tape (sticky paws deter cats)
- Motion-activated air spray (startles cat when approaching)
- Citrus-scented sprays (many cats dislike citrus)
Change the space: If your cat sprayed a corner of the couch, move a plant there or rearrange furniture. Changing the environment helps break the habit.
Long-Term Prevention Strategies
Add calming pheromones: Feliway diffusers release calming cat pheromones that reduce stress-related spraying. Plug one in near areas your cat has sprayed.
Litter box check:
- One box per cat, plus one extra
- Scoop twice daily (cats are picky)
- Large enough boxes (1.5x cat’s length)
- Low-stress locations (quiet, accessible)
- Try different litter types
Reduce territorial stress:
- Separate feeding areas in multi-cat homes
- Add vertical space (cat trees, shelves)
- Create separate territory zones
- Use slow feeders to reduce meal competition
Environmental enrichment:
- Daily play sessions (10-15 minutes)
- Window perches for bird watching
- Puzzle feeders and toys
- Scratching posts in key locations
Medical Check Required
Here’s something most people don’t know: about 30% of cat spraying is caused by medical issues, not behavioral problems.
Get a vet check if your cat:
- Started spraying suddenly
- Is straining to urinate
- Cries when using the litter box
- Urinates more frequently than usual
- Has bloody urine
- Is drinking more water than normal
Common medical causes:
- Urinary tract infections (UTI)
- Bladder stones or crystals
- Kidney disease
- Diabetes
- Hyperthyroidism
- Arthritis (hurts to get in litter box)
Your vet can: Run a urinalysis, check for infections, test kidney function, and prescribe medication if needed. Treating the medical issue often stops the spraying completely.
Stress and Behavioral Factors
Cats spray when they’re stressed. Common stress triggers:
- New pet in the home
- New baby or family member
- Moving to a new house
- Construction or remodeling
- Outdoor cats visible through windows
- Changes in routine
- Conflict with other household cats
How to help:
- Keep routines consistent (feeding, play, sleep times)
- Provide hiding spots and vertical escapes
- Consider calming supplements (ask your vet)
- Block windows if outdoor cats are causing stress
- Separate feuding cats temporarily
- Gradual introductions for new pets
Professional Cleaning: When to Call for Help
Sometimes DIY isn’t enough. Here’s when professional cleaning makes sense.
Situations Requiring Professionals
- Spray penetrated subflooring or furniture frames: You can’t reach these areas with home treatments
- Valuable or antique items: Don’t risk damaging irreplaceable pieces
- Dry-clean only fabrics with spray: Professional dry cleaners have special solvents
- Multiple rooms affected: Professional equipment covers large areas efficiently
- Smell persists after 4+ proper treatment attempts: You need industrial-strength solutions
What Professionals Offer
Ozone treatment: Ozone generators produce ozone gas that breaks down odor molecules at the molecular level. Very effective for set-in smells. ($200-400)
Hot water extraction: Professional-grade machines inject hot water and enzyme solution deep into fabrics, then extract it with powerful suction. Much more thorough than home spot cleaning. ($100-300 per piece)
Industrial enzyme treatment: Professional-strength enzymes (stronger than retail products) with specialized application equipment. ($150-350)
Odor sealing: For subfloors or structural wood, professionals can apply sealant that locks in remaining odor. ($200-500)
Certification: Some professionals provide odor-free certification useful if you’re selling your home. ($50-150 additional)
Cost Expectations
- Single furniture piece: $100-300
- Mattress treatment: $150-250
- Multiple rooms: $300-600
- Whole-house treatment: $500-1,200
- Per clothing item: Usually not cost-effective unless very valuable
Finding Qualified Cleaners
Look for:
- Pet odor specialists (not just general carpet cleaners)
- IICRC certification (Institute of Inspection, Cleaning and Restoration Certification)
- Reviews specifically mentioning cat urine success
- Guarantees or satisfaction policies
Questions to ask:
- What’s your success rate with old cat spray?
- What enzyme products do you use?
- Do you offer ozone treatment?
- Is there a guarantee if smell returns?
- What’s included in the quoted price?
Cost Analysis: DIY vs. Professional vs. Replacement
Let’s talk money. Should you spend time cleaning, pay a professional, or just replace the item?
DIY Treatment Costs
First-time setup:
- Enzyme cleaner (32 oz): $20-25
- White vinegar (gallon): $3-5
- Baking soda (box): $2-3
- Oxygen bleach: $8-12
- Total: $33-45
Cost per item after that: $3-8 depending on size and how much product you use
Time investment: 2-4 hours total (including soaking and air-dry time)
Professional Cleaning Costs
Upholstery/furniture:
- Couch: $150-300
- Chair: $75-150
- Mattress: $150-250
Not worth it for:
- Individual clothing items
- Items worth less than $50
- Things you can easily replace
Worth it for:
- Expensive furniture
- Antiques or heirlooms
- Multiple large items
- Structural spray issues
Replacement Costs
When replacement makes more sense:
| Item | Replacement Cost | Cleaning Cost | Better Choice |
|---|---|---|---|
| T-shirt | $10-30 | $5-8 DIY | DIY worth trying |
| Designer jeans | $100-300 | $8-10 DIY | DIY definitely |
| Cheap couch | $300-500 | $200-300 pro | Close call—try DIY first |
| Quality couch | $1,000-3,000 | $200-300 pro | Professional cleaning |
| Mattress | $300-2,000 | $150-250 pro | Try DIY, then pro, then replace |
| Cheap curtains | $30-100 | $5-10 DIY | DIY worth trying |
| Custom drapes | $500-2,000 | $100-200 pro | Professional cleaning |
My recommendation: Always try DIY first unless the item is extremely valuable or delicate. If DIY doesn’t work after 2-3 proper attempts, then decide between professional cleaning and replacement based on the item’s value.
Frequently Asked Questions
Q: Will washing clothes in hot water kill the cat spray smell?
A: No—hot water actually makes it worse. Heat causes the proteins in cat spray to bond permanently with fabric fibers. Once proteins are heat-set, they’re almost impossible to remove. Always use cold water.
Q: Can I just use Febreze or air freshener?
A: No—these products only mask the smell temporarily. Cat spray contains uric acid crystals that need to be broken down by enzymes. Covering up the smell with fragrance doesn’t remove the source, and it’ll come back. Your cat will still smell the pheromones even if you can’t.
Q: How many times can I wash the same item before giving up?
A: Most items respond within 2-3 proper treatment cycles. If you’ve done the full enzyme treatment process correctly 4 times and the smell persists, the item is either heat-set or the spray penetrated too deep. At that point, consider professional help or replacement.
Q: Is it safe to mix vinegar and enzyme cleaner together?
A: No—vinegar can deactivate enzymes. Use them in separate phases. Apply vinegar first, let it sit, rinse it out, then apply enzyme cleaner. Don’t mix them in the same bottle or apply them at the same time.
Q: Can I speed up the process? I need these clothes for work tomorrow.
A: Unfortunately, no. Enzyme cleaners need time to work—minimum 10-15 minutes, ideally longer. Air drying takes 24 hours. Rushing the process with heat or skipping steps means the smell will return. Keep backup work clothes for emergencies.
Q: Will enzyme cleaner damage my clothes?
A: Enzyme cleaners are safe for most washable fabrics, but always test on a hidden area first. Avoid using them on silk, some wools, or anything labeled “dry clean only.” For delicate fabrics, use gentler methods or consult a professional.
Q: My cat sprayed my leather couch. Can I use enzyme cleaner?
A: No—enzyme cleaners contain water that can damage leather. For leather, use a diluted vinegar solution (1:1 with water), apply gently with a barely-damp cloth, wipe with clean water, and recondition the leather afterward. For valuable leather furniture, call a professional.
Q: How do I know if the smell is really gone or if I’m just used to it?
A: Get a second opinion from someone who hasn’t been around the item. Leave the room for 30 minutes, then come back and smell it fresh. Use a UV blacklight—if there’s still residue, it’ll glow. And watch your cat—if they keep sniffing the spot, pheromones remain.
Q: Can I use bleach on cat spray?
A: Only oxygen bleach (OxiClean-type products), and only on white or colorfast fabrics. NEVER use chlorine bleach (Clorox). Mixing chlorine bleach with ammonia (which is in cat urine) creates toxic chloramine gas that can make you seriously sick.
Q: Is cat spray actually worse than regular cat pee?
A: Yes. Cat spray is much more concentrated and contains extra pheromones designed to last a long time and communicate with other cats. It’s specifically created by nature to be strong-smelling and persistent. That’s why it’s so much harder to remove than accidental litter box misses.
Conclusion and Action Steps
Cat spray on fabric feels like a disaster, but it doesn’t have to be. With the right approach—cold water, proper enzymes, and patience—you can save your clothes, furniture, and other fabrics.
The key things to remember:
- Act fast when spray is fresh
- Always use cold water, never hot
- Enzyme cleaners are essential, not optional
- Different fabrics need different approaches
- Don’t use heat until smell is completely gone
- Address the cause (medical or behavioral) to prevent recurrence
Your Action Plan Right Now
If your cat just sprayed something:
- Blot immediately with paper towels
- Rinse with cold water
- Apply enzyme cleaner and let it sit
- Follow the full treatment process in this guide
- Air dry completely before using heat
If you’re dealing with old spray:
- Use a UV blacklight to find all affected areas
- Prepare for multiple treatment cycles
- Use overnight enzyme soaks
- Be patient—each treatment helps
If spray keeps happening:
- Schedule a vet appointment to rule out medical issues
- Evaluate your litter box situation
- Consider environmental stressors
- Add Feliway diffusers
- Keep cleaned items away from your cat temporarily
Don’t let cat spray ruin your belongings or your relationship with your cat. With the knowledge in this guide, you have everything you need to tackle this problem successfully. Most cat spray can be completely removed when you use the right methods.
Your home can smell fresh again. Your favorite clothes can be saved. And your cat can be happy, healthy, and spray-free. Take action today, and you’ll be amazed at the difference.


