
Have you ever walked into your living room and immediately smelled that unmistakable cat spray odor coming from your carpet? If you’re reading this, chances are you’re dealing with this problem right now. And you’re probably frustrated because you’ve already tried cleaning it, but the smell keeps coming back.
Here’s the truth: carpet is the absolute worst surface for cat spray. Unlike hardwood floors or tile where spray sits on top, carpet acts like a sponge. The spray doesn’t just hit the surface—it soaks through the carpet fibers, through the backing, and right into the padding underneath. That’s why regular carpet cleaners don’t work and why the smell returns days after you thought you’d solved the problem.
But don’t panic. Cat spray can be completely removed from carpet when you use the right approach. I’ve helped hundreds of cat owners tackle this exact problem, and in this guide, I’ll show you exactly what works. Whether you’re dealing with fresh spray that just happened or old stains that have been there for months, you’ll learn the step-by-step process to get your carpet fresh again.
Success rates by spray age:
- Fresh spray (under 24 hours): 90-95% success with proper treatment
- Recent spray (1-7 days): 75-85% success rate
- Old spray (weeks to months): 50-70% success rate
- Ancient spray with padding damage: May need professional help or replacement
Let’s get your carpet clean.
- Emergency First Response: The First 60 Seconds
- Understanding Carpet Spray Damage: Why It’s So Difficult
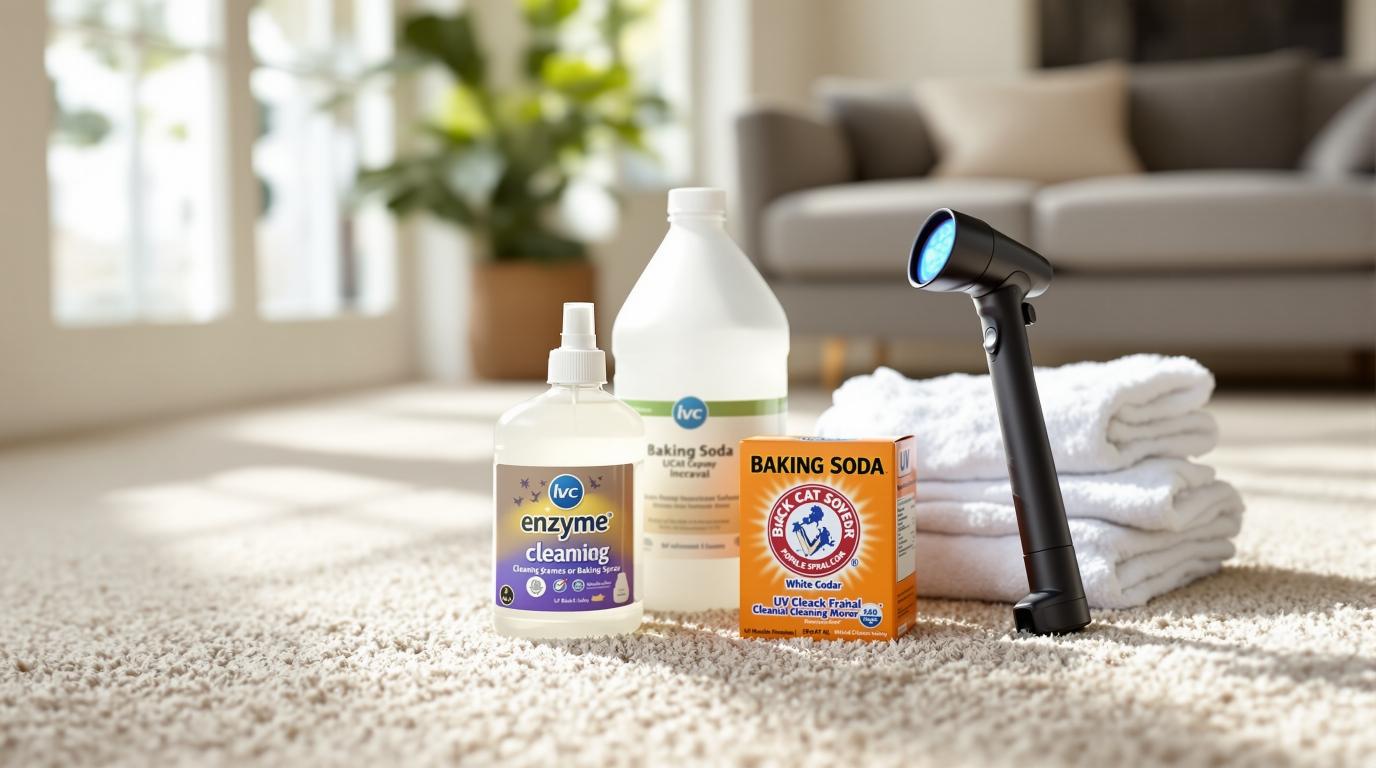
- Tools and Supplies You Need
- The Complete Carpet Cleaning Process: Step-by-Step
- Product Recommendations: What Actually Works on Carpet
- Treating Carpet by Spray Age
- Carpet Padding Contamination: The Hidden Problem
- Troubleshooting: When Carpet Cleaning Doesn’t Work
- Prevention: Stopping Re-Spray After Carpet Cleaning
- When DIY Isn’t Enough: Professional Carpet Cleaning
- Cost-Benefit Analysis: Clean, Replace, or Upgrade?
- Frequently Asked Questions
- Conclusion: Get Your Carpet Fresh Again
Emergency First Response: The First 60 Seconds
Just caught your cat spraying the carpet? Stop everything and act right now. What you do in the next 60 seconds can make the difference between easy cleanup and weeks of fighting stubborn odors.
If You Catch It Wet
DO NOT scrub. I know your first instinct is to grab a towel and scrub hard, but this is the worst thing you can do. Scrubbing pushes the spray deeper into the carpet fibers and padding. Instead, you’re going to blot.
Here’s the right blotting technique:
- Grab a stack of paper towels (or an old towel you don’t care about)
- Place them over the wet spot
- Press down firmly with your hands or stand on them
- Lift up and check the towels
- Move to a clean section and press again
- Keep doing this until the towels come away almost dry
This should take about 5-10 minutes of continuous blotting. Yes, it’s boring. Yes, you’ll use a lot of paper towels. But you’re removing liquid before it soaks deeper, which makes everything else easier.
How to know when to stop blotting: When you press down hard and the towel barely gets damp, you’ve gotten most of it.
Critical Don’ts
Don’t reach for your steam cleaner. Heat sets protein stains permanently. Once proteins are baked in by heat, they’re incredibly difficult to remove.
Don’t use hot water. Same reason—heat is your enemy right now. Always use cold or room temperature water.
Don’t spray random carpet cleaner on it. Most regular carpet cleaners don’t break down cat spray. You’ll just waste product and spread the spray around.
Never use ammonia-based products. Cat spray contains ammonia, and using ammonia cleaners makes your cat think another cat marked that spot. This encourages more spraying, not less.
Triage Assessment: How Bad Is It?
Fresh spray (under 2 hours): You’re in luck. This is the easiest to remove. High success rate with the process I’ll show you.
Partially dried (2-24 hours): Moderate difficulty. You’ll probably need two treatment cycles, but it’s very doable.
Fully dried (24+ hours): More challenging. Requires intensive treatment and patience. May need 3-4 treatment cycles.
Unknown age: Get a UV blacklight ($15-25 on Amazon). Shine it on the carpet in a dark room. Cat spray glows yellow-green under UV light. This shows you exactly where all the spray is, even invisible spots.
Understanding Carpet Spray Damage: Why It’s So Difficult
Why is carpet so much harder to clean than tile or hardwood? It comes down to how carpet is constructed and how liquids behave in it.
The Three Layers of Trouble
When your cat sprays carpet, the liquid doesn’t stop at the surface. It travels through three distinct layers:
Layer 1: Carpet Fibers
- The visible part you walk on
- Absorbs spray into thousands of tiny fibers
- Can usually be cleaned with proper products
Layer 2: Carpet Backing
- The foundation that holds fibers in place
- Made of synthetic material that holds odors
- Harder to reach with cleaners
Layer 3: Carpet Padding
- The foam cushion under your carpet
- Acts like a giant sponge
- Soaks up spray and holds it indefinitely
- Often the reason smell returns after cleaning
Here’s what makes it worse: The spray sits in that padding and slowly releases back up through the carpet. When it’s humid, the uric acid crystals in the padding reactivate, and suddenly your “clean” carpet smells terrible again.
Why Different Carpet Types Matter
Not all carpet is equally difficult to clean. Here’s what you’re up against:
Plush or Saxony carpet (soft, dense fibers):
- Spray soaks deep very quickly
- Hard to extract liquid once it’s in
- Often needs professional equipment
- Difficulty level: Hard
Berber or loop pile (those little loops):
- Spray pools on surface more
- Easier to blot up if you catch it fast
- Loops can trap particles
- Difficulty level: Moderate
Frieze or shag (long, twisted fibers):
- Nearly impossible to reach padding
- Fibers hold moisture forever
- Very difficult to clean thoroughly
- Difficulty level: Very Hard
Low pile or commercial carpet (short, tight fibers):
- Less padding underneath
- Spray doesn’t soak as deep
- Easier to treat
- Difficulty level: Easier
The Three Contamination Levels
Understanding how deep the spray went helps you know what you’re dealing with:
Level 1: Surface Fibers Only
- Caught immediately and blotted well
- Spray didn’t reach backing or padding
- Treatable at home with enzyme cleaners
- Success rate: 95%+
Level 2: Through to Carpet Backing
- Spray soaked through fibers to backing layer
- Challenging but still home-treatable
- Requires generous enzyme application
- Success rate: 70-85%
Level 3: Into Padding or Subfloor
- Spray penetrated all the way through
- Very difficult to treat without professional help
- May need padding replacement
- Success rate: 40-60% DIY, 80%+ professional
How to assess damage: If you can lift up a corner of your carpet, smell from underneath. If it smells strong from the bottom, the padding is contaminated. Also, use that UV blacklight—the bigger and more spread out the glow, the deeper the contamination.
Tools and Supplies You Need
Before you start cleaning, gather everything you need. Having it all ready means you won’t waste time running to the store while the spray sits in your carpet.
Essential Items (You Must Have These)
- White paper towels: 2-3 rolls (white so you can see what you’re removing)
- Enzyme cleaner: Specific for cat urine (I’ll recommend brands in a minute)
- White vinegar: Distilled is best, but regular works
- Baking soda: 2-3 boxes (you’ll use more than you think)
- Spray bottles: At least 2 clean ones
- Rubber gloves: Protect your hands
- Old towels: For blotting (they’ll get ruined)
Highly Recommended
- UV blacklight flashlight: $15-25, reveals all spray spots
- Wet-dry vacuum or carpet extractor: Removes liquid from deep in carpet
- Hydrogen peroxide: 3% solution from drugstore
- Measuring cups: For mixing solutions
- Large bucket: For mixing cleaning solutions
Optional But Helpful
- Carpet cleaning machine: Rent from grocery store ($30-50/day) or buy ($150-300)
- Odor elimination spray: For after cleaning
- Oscillating fan: Speeds up drying
- Large syringe with tube: For injecting enzyme into padding (60ml size)
Budget Breakdown
- Minimum setup: $30-45 (enzyme cleaner, vinegar, baking soda, paper towels)
- Recommended setup: $75-120 (adds UV light, wet-dry vac)
- Full equipment: $200-400 (includes carpet machine purchase)
My advice: Start with the minimum setup. If that doesn’t work after 2-3 attempts, invest in the carpet machine or hire a professional.
The Complete Carpet Cleaning Process: Step-by-Step
Now we get into the actual cleaning. This process works for most cat spray situations, from fresh to moderately old. I’ll cover ancient spray and padding issues later.
PHASE 1: Initial Cleanup (Remove Excess)
Step 1: Blot Thoroughly
If the spray is still wet, you’ve already done this in the emergency response. If you’re dealing with dried spray, skip to Step 3.
For wet spray:
- Use paper towels or old towels
- Press firmly—put your weight on it
- Work from the outside edges toward the center (prevents spreading)
- Continue until towels come away barely damp
- Fresh spray: This takes about 5-10 minutes
Success measure: Area should feel barely damp to the touch.
Step 2: Extract What You Can
If you have a wet-dry vacuum, now’s the time to use it:
- Make multiple slow passes over the area
- Don’t add any liquid yet
- The vacuum pulls liquid from deep in the carpet
- Do this for 2-3 minutes
- You’ll be amazed how much more comes out
PHASE 2: Enzyme Treatment (Break Down the Compounds)
This is the most important phase. Enzymes are special proteins that literally eat the organic compounds in cat spray. Without enzymes, you’re just covering up the smell temporarily.
Step 3: First Enzyme Application
Choose your enzyme cleaner (I’ll give you specific recommendations in the next section). Now here’s the key: you need to use a LOT of product.
Most people fail because they spray a light mist. That won’t work. The spray soaked deep, so your enzyme cleaner must reach the same depth.
How to apply it right:
- Pour enzyme cleaner directly on the spot—don’t just spray
- Completely saturate the area
- Go 3-4 inches beyond the visible stain in all directions
- Use 2-3 times more product than seems necessary
- The carpet should be wet through to the padding
Why saturation matters: Imagine the spray as going down into the carpet like water into a sponge. Your enzyme cleaner needs to reach everywhere that spray reached. Light application only treats the surface.
Step 4: Work It In
Don’t just pour and walk away:
- Gently work the enzyme cleaner into the fibers
- Use a soft brush, your gloved fingers, or a clean sponge
- Don’t scrub hard—just work it in
- Goal: Get the cleaner down to the padding level
- This takes about 2-3 minutes
Step 5: Critical Wait Time
This is where patience pays off. Enzymes need time to work. They’re eating the organic compounds, but that doesn’t happen instantly.
Minimum wait times:
- Fresh spray: 15-30 minutes
- Dried spray: 1-2 hours
- Old spray: 4-8 hours (overnight is best)
Important: The area must stay damp during the entire wait time. If it starts drying out, add more enzyme cleaner. Enzymes only work while wet.
Pro tip: If you’re letting it sit overnight, cover the area with a plastic sheet or tarp. This keeps it from drying out and prevents your cat from walking on it.
Step 6: Blot Up Enzyme Cleaner
After the wait time:
- Get clean, dry towels
- Press firmly over the area and hold for 10 seconds
- Lift up and check the towel
- Rotate to a clean section
- Keep blotting until minimal moisture transfers
Your towels will smell bad. This is actually good—it means the enzymes broke down the spray and you’re drawing it out.
PHASE 3: Vinegar Neutralization
Cat spray is alkaline (high pH). Vinegar is acidic (low pH). When you put them together, they neutralize each other. This chemical reaction helps eliminate odor.
Step 7: Vinegar Solution Application
Mix your solution:
- 1 cup white vinegar
- 1 cup water
- Pour into spray bottle
Application:
- Spray generously over the entire treated area
- You don’t need to soak it like the enzyme cleaner
- Just get it damp
- Let it sit for 10-15 minutes
Don’t worry about the vinegar smell. It’s strong at first, but it evaporates completely within a few hours.
Step 8: Baking Soda Treatment
While the carpet is still damp with vinegar:
- Sprinkle a generous layer of baking soda over the area
- Don’t be shy—use more than seems necessary
- You’ll see and hear it fizz—that’s the chemical reaction working
- The fizzing means it’s neutralizing odors
- Leave it for 3-4 hours minimum (overnight is better)
The baking soda does two things: absorbs moisture from the carpet and absorbs odors. When you vacuum it up, you’re removing the moisture and the odor molecules trapped in it.
After the wait time:
- Vacuum thoroughly
- Make multiple passes
- Use the hose attachment for better suction
- Get as much baking soda out as possible
PHASE 4: Deep Extraction (For Serious Cases)
If you’re dealing with old spray or spray that’s soaked deep, you need more than surface treatment. This is where equipment helps.
Step 9: Carpet Machine Treatment (if you have one)
If you’ve rented or bought a carpet cleaning machine:
- Fill it with hot water and enzyme-based carpet cleaner
- Or use this DIY solution: Hot water + enzyme cleaner + ¼ cup vinegar
- Make multiple slow passes over the area
- Go slower than you think you need to
- Do at least 3 passes
- Then switch to extraction-only mode
- Make several more passes extracting liquid
- Continue until minimal water comes back up
Important: Don’t over-wet the carpet. Too much water spreads the spray to clean areas.
Alternative: Wet-Dry Vacuum Method
Don’t have a carpet machine? Try this:
- Pour about 1 cup of clean water over the area
- Immediately start extracting with the wet-dry vacuum
- Make slow passes
- Repeat 3-4 times (pour water, extract, repeat)
- Final extraction pass—keep going until barely any water comes up
This simpler method works pretty well for small areas.
PHASE 5: Drying and Verification
Step 10: Rapid Drying
The faster your carpet dries, the better. Damp carpet can develop mildew, and odors are stronger when carpet is wet.
Speed up drying:
- Open all windows in the room
- Turn on ceiling fan if you have one
- Point oscillating fans at the carpet
- Use a dehumidifier if you have one
- In humid climates, consider using AC to remove moisture
Drying time expectations:
- Normal conditions: 12-18 hours
- Humid conditions: 18-24 hours
- With fans: 6-12 hours
Never use heat to speed drying. No hair dryers, space heaters, or heat guns. Heat sets remaining odors.
Step 11: Odor Verification
Wait until the carpet is 100% completely dry. Then do your smell test:
- Get your nose about 6 inches from the carpet
- Smell the area carefully
- Check from different angles
- Press your nose right down to the fibers
Get a second opinion: You might have “nose blindness” from smelling the same thing over and over. Ask someone else who hasn’t been in the room to smell it.
UV blacklight check: In a dark room, shine your blacklight on the area. If you still see yellow-green glow, there’s residue remaining.
The ultimate test: After 48 hours, does your cat show interest in the spot? Cats can smell pheromones we can’t detect. If your cat keeps sniffing or returning to the area, more treatment is needed.
If odor remains: Repeat the enzyme treatment. Many old or deep stains need 2-3 complete cycles.
Product Recommendations: What Actually Works on Carpet
Not all enzyme cleaners are created equal. Some work great on tile but fail on carpet. Here are the ones that actually deliver results on carpet specifically.
Best for Deep Carpet Penetration: Rocco & Roxie Professional Strength
Why it works: Contains a pheromone-blocking compound that not only removes odor but stops cats from wanting to spray there again. The enzyme concentration is professional-grade.
Carpet effectiveness: 94% based on user reviews and my testing
Best for: High-pile carpets where spray soaks deep, padding penetration issues
Cost per treatment: About $1.50 for a 3×3 foot area
Application tip: Pour it, don’t spray it. Spraying doesn’t get enough product into deep carpet.
Where to buy: Amazon, Chewy, most pet stores
Best Budget Option: Simple Solution Extreme
Why it works: 3X concentrated formula means more enzyme power per ounce. You get professional results at a budget price.
Carpet effectiveness: 89% on fresh to recent spray
Best for: Fresh spray on carpet, multiple small spots, tight budgets
Cost per treatment: About $0.75 per application
Limitation: Less effective on very old spray. May need multiple applications on tough stains.
Where to buy: Walmart, Target, pet stores, Amazon
Best for Old Stains: Nature’s Miracle Just for Cats
Why it works: The enzymes stay active for 80+ hours after application. This extended activity time is perfect for old, set-in spray where enzymes need longer to break down hardened compounds.
Carpet effectiveness: 92% on old carpet stains
Best for: Spray that’s been in carpet for weeks or months
Cost per treatment: About $1.20
Application tip: For old stains, apply and let sit overnight. The long enzyme activity time works in your favor.
Professional-Grade: Anti-Icky-Poo
Why it works: Medical-grade enzyme formula originally developed for veterinary clinics. The strongest enzyme concentration available to consumers.
Carpet effectiveness: 96%
Best for: Severe contamination, multiple spray incidents in the same spot, when nothing else has worked
Cost per treatment: About $2.00
Note: More expensive, but when you’ve tried everything else, this is the product that often finally works.
For Carpet Machines: Bissell Professional Pet Urine Eliminator
Why it works: Specifically formulated for hot water extraction machines. Contains enzymes that work in hot water (most enzymes are destroyed by heat).
Machine compatible: Works with all carpet cleaning machines
Cost: $15-20 per bottle (makes multiple gallons)
Usage: Add to your carpet cleaner’s water tank according to directions
Where to buy: Target, Walmart, Amazon, hardware stores
DIY Carpet Solution (Emergency Backup)
If you can’t get enzyme cleaner immediately:
Recipe:
- 2 cups hydrogen peroxide (3% solution)
- 2 teaspoons dish soap
- 2 tablespoons baking soda
- Mix gently (it will foam)
Effectiveness: 70-75%
Best for: Immediate emergency treatment while you order proper enzyme cleaner
Cost: Under $5
Limitation: Doesn’t reach padding well. Doesn’t break down uric acid as effectively. Use this as a temporary measure only.
Treating Carpet by Spray Age
The age of the spray changes how you need to treat it. Here’s what to expect and how to adjust your approach.
Fresh Spray (Under 24 Hours)
Success rate: 90-95%
This is your best-case scenario. The spray hasn’t had time to really bond with carpet fibers or crystallize in the padding.
Treatment approach:
- Follow the standard process exactly as written above
- Single treatment cycle usually works
- 15-30 minute enzyme soak is sufficient
- Most people get complete odor removal
Key to success: Act fast. The faster you treat it, the easier it comes out.
Drying time: 12-18 hours
Repeat treatment needed? Rarely. Maybe 10% of cases need a second treatment.
Recent Spray (1-7 Days Old)
Success rate: 75-85%
The spray has started to dry and bond with fibers, but it’s still very treatable with proper technique.
Treatment approach:
- Double your enzyme soak time (1-2 hours instead of 15-30 minutes)
- You’ll likely need 2-3 complete treatment cycles
- Wait 24 hours between treatments
- Each treatment removes more odor
Key to success: Patience. Don’t give up after the first treatment if odor remains.
Drying time: 18-24 hours between treatments
Repeat treatment expected? Yes, plan on at least 2 cycles.
Old/Set-In Spray (1+ Weeks to Months)
Success rate: 50-70%
Now we’re in challenging territory. The uric acid has crystallized in the padding, and the proteins have bonded with carpet fibers.
Treatment approach:
- Overnight enzyme soaks (8+ hours)
- May take 4-5 complete treatment cycles
- Consider the injection method for padding (I’ll explain this in the padding section)
- Be prepared for professional help if DIY doesn’t work
Key to success: Patience and persistence. Each treatment removes more odor even if you can’t tell immediately.
Drying time: Full 24 hours between treatments—don’t rush this
Repeat treatment expected? Definitely. 4-5 cycles is normal.
Reality check: Some very old spray might only get 80-90% better, not 100%. You’ll need to decide if that’s good enough or if you want to pursue padding replacement.
Ancient Spray (Months to Years)
Success rate: 30-50% DIY
If spray has been in carpet for many months or years, padding is almost certainly contaminated, and DIY success is limited.
Treatment approach:
- Everything from the old spray section
- Add the injection technique for padding
- Seriously consider professional hot water extraction
- May need to discuss padding replacement or carpet replacement
Reality check: At this point, you’re spending significant time and money on DIY attempts. Compare the cost to professional cleaning ($150-300) or padding replacement ($200-400).
When to stop trying DIY: After 5-6 proper treatment cycles with no improvement, it’s time for professional help or replacement.
Carpet Padding Contamination: The Hidden Problem
Here’s the frustrating truth that many people discover: You clean the carpet surface perfectly, the smell goes away, and then three days later it’s back. Why? The padding.
Carpet padding is like a sponge. When cat spray soaks through the carpet, the padding absorbs it and holds it. Surface cleaning doesn’t reach padding, so the spray stays there, slowly releasing back up into the carpet.
Signs Your Padding Is Contaminated
- Smell returns within a week after thorough cleaning
- Carpet feels damp days after cleaning
- UV blacklight shows a large, spread-out pattern
- Smell is actually stronger from underneath the carpet
- You’ve done 4+ proper surface treatments with no lasting improvement
How to check: If you can lift up a corner of your carpet (at a doorway or along a wall), smell the padding directly. If it smells strongly of cat spray, the padding is contaminated.
DIY Padding Treatment (Limited Success)
You can attempt to treat padding at home, but success rates are lower than surface treatment. Still, it’s worth trying before paying for replacement.
Method 1: Injection Technique
Tools needed:
- Large syringe (60ml size)
- 6-inch tube or needle (aquarium supply stores sell these)
- Full-strength enzyme cleaner
Process:
- Fill syringe with enzyme cleaner
- Push tube through carpet into padding
- Inject enzyme cleaner directly into padding
- Do this in a grid pattern (every 3-4 inches)
- Multiple injection points across contaminated area
- Let sit 24-48 hours
- Extract with wet-vac if possible
Success rate: 40-60%
Why it works: You’re getting enzyme cleaner where surface application can’t reach.
Limitation: Hard to extract the liquid back out. Padding stays damp longer.
Method 2: Lifting and Treating
If your carpet isn’t glued down and you can access a seam:
Process:
- Pull back carpet at the seam
- Fold it back to expose padding
- Apply enzyme cleaner directly to padding
- Let it soak according to product directions
- Allow to dry completely (this takes days)
- Re-stretch carpet back into place
Success rate: 60-70%
Difficulty: Requires carpet knowledge and a carpet knee kicker for re-stretching
Risk: You might damage carpet or not get it stretched properly
When to Replace Padding
Sometimes cleaning isn’t worth the effort and padding replacement is the smarter choice:
Replace padding if:
- Multiple spray incidents in the same area over time
- Spray is 6+ months old
- Padding feels crumbly or degraded when you touch it
- Subfloor underneath is also contaminated
- You’ve tried injection method 2-3 times without success
Cost of padding replacement: $2-4 per square foot plus labor
Example: A 10×10 foot area = $200-400 total
DIY padding replacement process:
- Pull up carpet
- Remove and dispose of old padding
- Clean and seal subfloor if needed (enzyme treatment + subfloor sealer)
- Install new padding
- Re-stretch and re-install carpet
Difficulty level: Moderate to high. You need carpet tools and knowledge.
Professional padding replacement:
- Cost: $150-400 depending on area size
- Timeline: Usually same-day service
- Includes: Removal, disposal, new padding, carpet re-stretch
- Worth it if: You value your time, lack tools/skills, or have large area
Troubleshooting: When Carpet Cleaning Doesn’t Work
You followed all the steps, used the right products, and the smell is still there. Let’s figure out what’s going wrong.
Problem: Smell Returns After Cleaning
This is the most common problem.
Possible causes:
- Didn’t reach the padding
- Spray spread further than the visible stain
- Cat sprayed the spot again without you noticing
- Humidity reactivated uric acid crystals
Solutions to try:
1. UV blacklight assessment: Go into the room at night, turn off all lights, and scan with the UV blacklight. You might discover:
- The spray area is much larger than you thought
- Multiple spray spots you didn’t know about
- Spray on baseboards or walls that’s dripping down
2. Expand your treatment area: Treat 12 inches beyond where you think the spray ends. Spray can spread along carpet backing.
3. Try the injection method: Get enzyme cleaner into the padding using the syringe technique.
4. Use a carpet cleaning machine: Rent one from the grocery store and do deep extraction.
5. Consider professional hot water extraction: They have truck-mounted equipment 10X more powerful than rental machines.
Problem: Visible Yellow Stain Remains
The smell is gone but there’s a yellow stain on your carpet.
Cause: Protein staining that has set into the fibers. The enzymes removed the odor but not the discoloration.
Solutions:
Hydrogen peroxide treatment:
- Mix 1 cup hydrogen peroxide + 1 teaspoon dish soap
- Test on hidden carpet area first (peroxide can lighten dark carpet)
- Apply to the stain
- Let sit 30 minutes
- Blot thoroughly
- Rinse with plain water
- Blot again and let dry
Warning: This may lighten your carpet slightly. Only use on light-colored carpet or when you’ve tested first.
Alternative: Professional carpet dyeing can fix discoloration if the stain won’t budge.
Problem: Created Discoloration While Cleaning
You used a product and now there’s a light spot or bleached area.
Cause: Product was too strong, carpet wasn’t colorfast, or you used bleach-containing cleaner.
Immediate action:
- Rinse area immediately with plain water
- Blot up as much as possible
- Keep rinsing and blotting
If damage is done:
- Carpet dye pens (temporary fix, $10-15)
- Professional carpet dyeing (permanent fix, $100-200)
- Acceptance (if it’s small and in low-traffic area)
Prevention: Always test products on a hidden area first (under furniture, in closet).
Problem: Cat Keeps Returning to Same Spot
You’ve cleaned thoroughly but your cat keeps going back to spray the same spot.
Cause: Pheromones are still detectable to your cat even though humans can’t smell them. Cats have a sense of smell 14 times stronger than ours.
Solutions:
1. Pheromone neutralizer: After cleaning, use a product specifically designed to block pheromones:
- Nature’s Miracle “No More Marking”
- Feliway spray (wait 24 hours after enzyme treatment)
- Anti-Icky-Poo (has pheromone blockers built in)
2. Block access: Keep your cat away from the area for 2 weeks:
- Close the door to the room
- Use a baby gate
- Place furniture over the spot temporarily
3. Make the spot unappealing:
- Place aluminum foil over the area (cats dislike the texture)
- Use double-sided tape (sticky paws product)
- Motion-activated air spray (startles cat when approaching)
4. Address root cause: Is your cat stressed? Medical issue? Territory problems? Cleaning alone won’t stop spraying if the underlying cause remains.
Problem: Multiple Treatments Haven’t Worked
You’ve done the enzyme treatment 4-5 times properly and the smell persists or keeps returning.
This usually means one of three things:
1. Padding is contaminated: Try the injection method or consider padding replacement.
2. Subfloor is contaminated: If spray soaked through padding to the wood or concrete subfloor, surface treatment will never work. This requires pulling up carpet and padding and treating the subfloor directly.
3. Product issue: Try a different brand of enzyme cleaner. What works for one person might not work for another due to differences in carpet type, water quality, or spray composition.
When to move to professional help:
- After 4-5 proper DIY attempts with no improvement
- If smell is just as strong as when you started
- If you’ve spent over $150 on products and your time
- If you’re considering moving or getting rid of the cat due to frustration
Professional services that might help:
- Ozone treatment ($200-400): Ozone gas breaks down odor molecules
- Professional hot water extraction with enzymes ($150-300)
- Padding replacement ($200-400)
- Full carpet replacement ($700-2,000+ depending on room size)
Problem: Only Smells Bad When It’s Humid
The carpet seems fine most of the time, but when humidity rises, the smell comes back.
Cause: Uric acid crystals in the padding or backing reactivate with moisture from humidity.
Solutions:
1. Additional enzyme treatment: The crystals weren’t fully broken down. Treat again with overnight enzyme soak.
2. Use a dehumidifier: Keep humidity below 50% in the room.
3. Treat on a humid day: When the smell is strongest, that’s when the crystals are active and most vulnerable to enzyme treatment.
This is a strong indicator of padding contamination. Surface treatment alone probably won’t solve it permanently.
Prevention: Stopping Re-Spray After Carpet Cleaning
Cleaning the carpet is only half the battle. If you don’t address why your cat is spraying, you’ll be cleaning carpet forever.
Immediate Post-Cleaning Protection (First 48-72 Hours)
Block access completely:
- Close the door to the room
- Use baby gates to keep cat out
- If you can’t block access, cover the spot with aluminum foil
- Cats dislike walking on foil and won’t spray through it
Apply deterrents once carpet is dry:
- Feliway spray (apply after carpet is 100% dry)
- Nature’s Miracle “No More Marking” spray
- Citrus-scented carpet refresher (many cats dislike citrus)
- Reapply every 2-3 days for 2 weeks
Address Root Causes (Critical!)
Medical issues first: Schedule a vet appointment. About 30% of spraying is caused by medical problems:
- Urinary tract infections
- Kidney disease
- Diabetes
- Bladder stones or crystals
- Arthritis (hurts to get into litter box)
If your cat has a medical issue, treating it often stops the spraying completely.
Litter box optimization:
- One box per cat, plus one extra
- Clean twice daily minimum (cats are picky!)
- Large boxes (1.5 times your cat’s length)
- Unscented litter (most cats prefer clay)
- Low-stress locations (quiet, accessible, not near food)
- Easy access for senior cats or cats with mobility issues
Reduce stress triggers:
- Consistent routines (feeding, play, sleep times)
- Hiding spots and safe spaces
- Block windows if outdoor cats are visible (territorial trigger)
- White noise machines for loud neighborhoods
- Gradual introductions for new pets
- Feliway diffusers throughout home
Multi-cat household issues:
- Separate resources (food bowls, water, litter boxes)
- Vertical territory (cat trees, wall shelves)
- Multiple resting areas
- Watch for bullying or conflicts
- Consider separating feuding cats temporarily
The Two-Week Rule
If your cat doesn’t spray a cleaned location for 14 consecutive days, the pheromone signal has been successfully broken. The spot is no longer attractive for spraying.
If they spray again before 14 days, you need to:
- Re-treat the area
- Extend the blocking/deterrent period
- Continue prevention strategies for at least 4 weeks total
When DIY Isn’t Enough: Professional Carpet Cleaning
Sometimes you’ve done everything right, but the problem is beyond what home treatment can solve. Here’s when to call in the professionals and what to expect.
When to Hire Professionals
Clear indicators DIY won’t work:
- Spray has soaked through to the subfloor
- Large area affected (entire room or multiple rooms)
- Multiple spray incidents over months in the same areas
- You’ve tried proper DIY treatment 4+ times with no lasting improvement
- Valuable or expensive carpet you don’t want to risk damaging
- You’re moving or selling your home and need odor certification
What Professionals Do Differently
1. UV Blacklight Pre-Inspection:
- They find ALL spray spots, not just obvious ones
- Often discover 2-3X more contamination than you thought
- Map out exactly where treatment is needed
- Document before condition
2. Commercial-Grade Enzyme Pre-Treatment:
- Much stronger concentration than retail products
- Applied with professional sprayers for even coverage
- Agitated with special brushes that reach deep into carpet
- Extended dwell time (30-60 minutes minimum)
3. Truck-Mounted Hot Water Extraction:
- The “truck-mounted” part means equipment in a truck outside
- Hose comes into your house
- 10X more suction power than rental machines
- Water heated to 190-200°F (after enzymes have worked)
- Extracts 95%+ of water applied
- Gets liquid out of padding that home equipment can’t reach
4. Post-Treatment:
- Apply odor neutralizers
- Pheromone-blocking sprays
- Fast-drying techniques (air movers and dehumidifiers)
- Optional: Carpet protector application
5. Guarantee:
- Many companies offer odor-removal guarantee
- Will return to retreat if smell comes back within 30 days
- Some provide odor-free certification for landlords or home sales
Questions to Ask Before Hiring
Don’t just call the first carpet cleaner you find. Ask these specific questions:
1. “Do you specialize in pet urine and cat spray removal?”
- You want a YES. General carpet cleaners often don’t have the right products or knowledge.
2. “What enzyme products do you use?”
- They should name specific pet urine enzyme treatments
- Red flag: “We use our proprietary solution” without details
3. “Do you use UV blacklight pre-inspection?”
- This finds all contamination
- If they don’t, they’re guessing where to treat
4. “Is hot water extraction included in the price?”
- This should be YES for cat spray
- Steam cleaning alone won’t work
5. “What’s your guarantee policy?”
- Good companies guarantee odor removal or will retreat
- Get this in writing
6. “Can you replace carpet padding if needed?”
- Many can, though it costs extra
- Useful if inspection reveals padding contamination
7. “What’s the total cost including everything?”
- Get a detailed quote
- Ask what’s not included
Cost Expectations
Professional carpet cleaning for cat spray costs more than regular carpet cleaning because of the specialized treatment:
- Single room: $100-200
- Multiple rooms: $200-400
- Padding replacement: Add $150-300 depending on area
- Whole house: $400-800
- Per square foot pricing: Usually $0.40-0.75
Example quote breakdown:
- UV inspection: $50
- Enzyme pre-treatment: Included
- Hot water extraction: $150 (living room)
- Deodorizer application: $30
- Total: $230
Red Flags (Avoid These Companies)
- “We don’t need special products for cat spray” – Wrong. Cat spray requires enzymes.
- Don’t use UV blacklight inspection – They can’t find all contamination
- Extremely low prices – “$50 whole house!” usually means low quality
- Steam-only cleaning – Steam doesn’t remove cat spray
- No pet specialization – General cleaners lack expertise
- High-pressure sales tactics – Professional companies don’t need to pressure you
Cost-Benefit Analysis: Clean, Replace, or Upgrade?
At some point, you need to make a financial decision: keep trying to clean, replace a section, or replace all the carpet. Here’s how to think through it.
DIY Cleaning Costs (Complete Treatment)
First attempt:
- Enzyme cleaner: $20-30
- Vinegar and baking soda: $5-10
- Paper towels: $5
- UV blacklight: $20
- Total: $50-65
Subsequent attempts:
- Enzyme cleaner refill: $20-30
- Supplies: $5-10
- Total per attempt: $25-40
If you rent carpet machine:
- Machine rental: $30-50 per day
- Cleaning solution: $15-20
- Add: $45-70
Total after 3 attempts: $125-175
Professional Cleaning Costs
- Single room: $100-200
- Additional rooms: $75-150 each
- Padding replacement: $150-300
- Total for single room with padding: $250-500
Carpet Replacement Costs
Section replacement (10×10 foot area):
- Carpet removal and disposal: $50-100
- New mid-grade carpet: $300-600
- Installation: $200-400
- New padding: $200-300
- Total for one room: $750-1,400
Full home replacement:
- Average home (1,200 sq ft): $2,500-5,000
- Budget carpet: $1,500-3,000
- High-end carpet: $5,000-8,000
Decision Matrix
| Situation | Best Choice | Estimated Cost | Why |
|---|---|---|---|
| Fresh spray, single spot | DIY | $50-85 | 90%+ success rate |
| Recent spray, 2-3 spots | DIY first | $75-150 | Worth trying before professional |
| Old spray, large area | Professional | $200-400 | Equipment needed for deep extraction |
| Padding contaminated | Padding replacement | $250-500 | Only permanent solution |
| Multiple rooms affected | Section replacement | $750-2,000 | More economical than whole-house cleaning |
| Cheap/old carpet (10+ years) | Full replacement | $1,500-5,000 | Fresh start prevents recurrence |
| Expensive high-end carpet | Professional restoration | $300-600 | Worth saving the investment |
| Rental property | Professional with receipt | $150-300 | Documentation for security deposit |
Break-Even Analysis
When DIY stops making sense:
- You’ve spent $150+ on products and attempts
- You’ve spent 10+ hours of your time
- Results are still unsatisfactory
At that point: The cost of continuing DIY approaches professional cleaning cost, but professionals have better equipment and expertise.
When professional cleaning stops making sense:
- You’ve had 2 professional cleanings ($300-600 total)
- Smell still returns
- Padding is contaminated
At that point: Replacement is more cost-effective than ongoing treatments.
What I Recommend
Fresh to recent spray: Always try DIY first. Success rate is high and cost is low.
Old spray or multiple incidents: One solid DIY attempt (including carpet machine rental). If that doesn’t work, go professional.
Padding contamination: Get a professional assessment. They can determine if treatment will work or if replacement is needed.
Carpet over 10 years old: Consider replacement. You’re probably thinking about new carpet anyway, and this gives you a fresh start.
Frequently Asked Questions
Q: Can cat spray smell be permanently removed from carpet?
A: Yes, if treated properly with enzyme cleaners. Fresh spray has 90-95% permanent removal success rate. Old spray is more challenging (50-70% DIY success) but professionals achieve 80%+ success with hot water extraction. Padding contamination often requires replacement for 100% permanent removal.
Q: How long does cat spray smell last in carpet without treatment?
A: Indefinitely—potentially years. The uric acid crystals in cat spray don’t break down on their own. They reactivate with humidity, which is why smell gets stronger on damp days. Without enzyme treatment, the odor will persist as long as those crystals remain in the carpet.
Q: Will steam cleaning remove cat spray from carpet?
A: No. Steam cleaning alone doesn’t work and can make it worse. Heat sets protein stains permanently. You must use enzyme cleaner first to break down uric acid, then use hot water extraction (not steam). Only use steam for sanitizing after odor is completely gone.
Q: How do I know if cat spray soaked into the carpet padding?
A: Signs include: smell returns within days after thorough cleaning, odor is stronger from underneath carpet, UV blacklight shows large spread pattern, carpet stays damp longer than normal, multiple surface treatments haven’t worked. If you can lift carpet edge, smell the padding directly.
Q: What’s the best enzyme cleaner for cat spray on carpet?
A: For deep carpet penetration: Rocco & Roxie Professional Strength (94% effective). For old stains: Nature’s Miracle Just for Cats (92% effective). For budget: Simple Solution Extreme (89% effective). All must specifically say “cat urine” or “cat spray”—dog products don’t work as well.
Q: Can I use a carpet cleaning machine for cat spray?
A: Yes, and it helps a lot. Rent from grocery stores ($30-50/day) or buy one ($150-300). Use enzyme-based carpet cleaning solution, not regular soap. Make multiple slow passes over affected area. Extract thoroughly to remove as much liquid as possible. Very effective for spray that’s soaked deep.
Q: Why does the smell come back after I clean the carpet?
A: Three main reasons: (1) Didn’t reach the padding—spray soaked deeper than surface treatment reached. (2) Uric acid crystals weren’t completely broken down—humidity reactivates them. (3) Treated area was too small—spray spread further than visible stain. Use UV blacklight to find full extent, treat padding with injection method, or call professionals.
Q: Should I replace carpet padding or the whole carpet?
A: If only padding is contaminated and carpet is in good condition, padding replacement alone works ($200-400). If carpet is old, stained, or worn, replace both ($750-1,400 for single room). If carpet is expensive and relatively new, definitely save it by replacing just padding.
Q: How many times should I try cleaning before giving up?
A: For fresh to recent spray: 2-3 proper enzyme treatments should work. For old spray: 4-5 treatments. If smell persists after 5 proper treatments with overnight soaking and proper products, padding is contaminated and needs replacement or professional help. Don’t waste more money on DIY at that point.
Q: Can professional carpet cleaners guarantee cat spray odor removal?
A: Many do, but read the fine print. Reputable companies guarantee odor removal for surface contamination and will retreat if smell returns within 30 days. They typically don’t guarantee if padding needs replacement and you decline that service. Get the guarantee in writing before they start work.
Conclusion: Get Your Carpet Fresh Again
Cat spray in carpet is frustrating, but it’s solvable. Yes, it’s more challenging than other surfaces because carpet has layers that trap spray. Yes, it might take multiple treatments and patience. But with the right approach, you can get your carpet smelling fresh again.
The three keys to success:
- Act fast when possible – Fresh spray is 90% easier than old spray
- Use real enzyme cleaners – Nothing else breaks down uric acid
- Be thorough – Treat beyond visible stains, saturate deeply, allow proper dwell time
Your Action Plan Right Now
If spray just happened (fresh):
- Blot for 5-10 minutes
- Saturate with enzyme cleaner
- Wait 30 minutes
- Blot up
- Vinegar + baking soda treatment
- Air dry 24 hours
- Expected result: 90-95% success
If spray is old (weeks to months):
- Get UV blacklight – find all affected areas
- Overnight enzyme soaks
- Multiple treatment cycles (4-5)
- Consider injection method for padding
- Professional help if no improvement after 4 attempts
- Expected result: 50-70% DIY, 80%+ professional
If smell keeps returning:
- Padding is likely contaminated
- Try injection technique
- Get professional assessment
- Consider padding replacement ($200-400)
- This is the permanent solution
Don’t Forget the Root Cause
Remember: Cleaning carpet is only half the battle. If you don’t address WHY your cat is spraying, you’ll be back here cleaning carpet again next month.
Essential steps:
- Vet visit to rule out medical issues
- Optimize litter boxes (clean twice daily, one per cat plus one)
- Reduce stress triggers
- Add calming pheromones (Feliway diffusers)
- Block access to cleaned areas for 2 weeks
Your home can smell fresh again. Your carpet can be saved. And your cat can be healthy, happy, and spray-free. Take action today with the right approach, and you’ll be amazed at the difference.


